Wednesday, September 29, 2010

PISTACHIO KULFI - INDIAN ICE CREAM


Kulfi is also referred to as the Indian ice cream. It is just like the ice cream but has a thicker and creamy texture because of how it’s made. My love affair with kulfi has been a very long one, but I have never attempted to make it at home because you need an ice cream maker for that perfect creamy texture. After researching for a few days, I found a couple of tips and tricks to get kulfi made without an ice cream maker.
So, here is how I made Kulfi for the first time. I have used pistachio flakes only but you can also add almond flakes. Btw, please keep everything you need at reachable distance before you boil the milk because then you can’t wander away till the mixture is taken off the stove. Happy cooking!!! J

Ingredients: (serves 8 to 10)

Whole milk - 7 cups
Sugar - ½ cup (can be adjusted to taste)
Pistachio - ¼ cup powdered
Pistachio flakes - ¼ cup
Vanilla extract - 2 drops
White bread - 2 or 3 slices
Corn starch - 2 teaspoons
Freshly powdered Cardamom - 1 heaped teaspoon

Method:
1.       Cut the sides of bread and take only white portion. Mix with 1 cup milk and corn starch. Grind into smooth paste and keep aside.
2.       Pour milk in to a sauce pan and boil at medium high stirring continuously. If you don’t do that the milk burns at the bottom of the pan. Reduce flame when milk starts boiling.
3.       Add vanilla extract once milk starts boiling.
4.       Once the water content in the milk has reduced to almost half add the bread and cornstarch mixture and continue stirring.
5.       After few mins add sugar and let it dissolve completely.
6.       Then add powdered pistachio, sprinkling little by little and stirring it into the mixture.
7.       Add the pistachio flakes.
8.       Now when milk has thickened (quantity reduces to half of original content) and ready to be taken of the stove, add the cardamom powder.
9.       Remove from flame and pour into container for cooling. Let the mixture cool to room temperature. You still have to keep stirring once in a while otherwise a thick layer forms at the top.
10.   Now place a layer of cling film on top of the mixture lightly pressing to surface of the mixture as shown in picture below.
11.   Freeze for 6 hours and serve.

Tips n Tricks:
·         Well on this one the trick is don’t leave the milk unattended at any point.
·         And also stir the contents that stick to sides of pan back into the mixture.

Tuesday, September 28, 2010

SPINACH & EGG IN FAVA BEANS


Dinner Time!!!! From the last week, dinner is that time when I have to put on my thinking cap because I owe my readers a good post the next day J.
It’s month end and my kitchen cupboards are almost washed out....so all I had was a bunch of spinach, some eggs..n a few other not so interesting stuff...nothing to combine....I wanted to try something not spicy today...which was going to be harder because I simply adore my rack of spices. So finally fishing around, I found a can of fava beans (broad beans)...personally, I am not a big fan of those. But today, I decided they are going to serve my dinner.  And they did not disappoint me one bit.....Mmmmm am still salivating...hehehe....
Fava bean is stapled Arabic food. It’s used to make a dish called “Ful Medames that has olive oil, onion, garlic and parsley. Well, here we are using olive oil and garlic for cooking because it gives an absolutely mind blowing smell to the food.
This recipe was created in MJ’s Kitchen, for healthy and deliciousssss eating! Cheers!!!!

Ingredients: (serves 4)
Fava beans/ Broad beans- 1 can
Chick peas- ¼ can
Spinach - 1 freshly chopped bunch
Eggs - 2 hard boiled
Garlic - 7 or 8 cloves
Green chillies (optional) - 3 slit open (for those who like it hot)
Olive oil - 2 tablespoon

Method:

1.       Heat olive oil in a pan
2.       Add garlic and chillies, sauté till garlicy aroma lingers.
3.       Then add the spinach and cook with lid on till spinach shrinks.
4.       Now throw in the fava beans and chick peas. Mash it well.
5.       Cook for sometime till water content from canned items reduces to minimum.
6.       Now crush the egg yolk and sprinkle it in.
7.       Last dice the egg white and add.
8.       Finally check the salt and adjust.
9.       Serve hot, hot, hot with pita bread!!!

Tips n Tricks:
·         Boil eggs in a teaspoonful salted water. So your eggs won’t break.
·         Soak boiled egg in cold water for 20mins before removing the shell and you will get perfect hardboiled eggs.

Monday, September 27, 2010

SPICY RICE PORRIDGE - Healthy and Tasty!!


It’s called “Jeeraka Kanji” in Malayalam, where jeerakam means cumin and kanji means porridge...an easy preparation which has medicinal values due to what goes in there. It’s a traditional preparation during the holy month of fasting (Ramdan) for Muslims. I learnt this one from my mom in law....It’s her son’s (my hubby) favourite dish!!
The brown rice used for this preparation is broken or crushed, which gives it a 'melt in the mouth' texture when cooked. So here’s to healthy eating from MJ’s kitchenJ!!

Ingredients: (serves 4-5)

Crushed/ broken brown rice - 2cups
Water- 5 to 6 cups for cooking rice
Coriander seeds- 2 tablespoons
Cumin seeds- 2 tablespoons
Garlic- 6 or 7 cloves halved
Salt to taste

For grinding:
Coconut-3 cups grated or thick coconut milk -2 cups
Shallots- 5 or 6
Cumin seeds - a pinch
Turmeric powder- 1/4 teaspoon

Method:
1.       Powder the cumin seeds and coriander seeds.  Add this to rice.
2.       In a vessel add 5 cups of water and bring to boiling.
3.       Then add rice mixture and garlic. Let it cook at medium flame. Process might take up to 30 mins. The rice should be very finely cooked. Extra water can be added if water content reduces to less than half before rice is fully cooked.
4.       Grind listed items into fine paste with little water.
5.       When rice is completely cooked, reduce flame. Add paste and mix well.  Heat only till a frothy texture from the coconut milk appears on top of gravy.
6.       Let it stand for a while before serving.
7.    Pickles are the best side dish for Spicy Porridge.

Sunday, September 26, 2010

OKRA IN YOGURT

The ladies finger, just as elegant as its name....it is also one of the most nutritious vegetables. This dish is originally from my mom’s kitchen. It’s one of my favourite ones too...simple and delicious...and can be served with rice, pita bread or chapattis.

And for those people who mistake this dish for "vendekya pachadi". This has nothig to do with that dish and has an entirely different preparation.

Ingredients: (serves 6-7)

Baby okra - ½ kg thinly sliced
Onion - 1 large thinly sliced
Tomato- 1 large chopped
Yogurt - 1 ½ cup
Green chilli paste - 1 teaspoon
Mustard seeds - ¼ teaspoon (optional)
Curry leaves - 1sprig (optional)
Oil- 1 tablespoon
Salt to taste

Method:
1.       Heat oil in a vessel
2.       Splutter mustard seeds. Add green chilli paste and curry leaves.
3.       Sauté onion and till almost golden.
4.       Add tomato and cook with lid closed.
5.       Once tomato mixes in well, add okra and salt to taste. Close vessel and let it cook, stirring  occasionally till okra is well done. Then transfer the mixture into a bowl and let it cool.
6.       Once cooled to room temperature, add the yogurt and mix well. Adjust salt and serve.

Tips & Tricks:
·         Use coconut oil for that zing in the flavour.

SAUCY CHICKEN AND VEGETABLES

Thanks everyone for voting me to the top 9 on FOODBUZZ.

Authentic Chinese sauces and seeds are impossible to get in regular supermarkets. And when you have to discover a combination for your rice (POST: ROMANCE WITH LEFTOVERS!!) there is nothing but the racks of your refrigerator to shop off!! So here’s presenting Saucy Chicken and vegetables.
You can garnish with white sesame seeds. Too bad, I was out of stock on them.

Ingredients: (serves 4)
Boneless Chicken fillet -2 cut into thin strips
Carrot, beans, capsicum cut into thin strips - 1cup each
Onion- 1 diced
Chopped Garlic and Ginger- 2 teaspoon each
Vegetables stock - ½ cup
Green chillies- 2 slit open
Ground pepper - 1 tablespoon
Olive oil - 1 tablespoon
Corn flour - ½ tablespoon mixed well in ¼ cup water

Sauce:
Tomato ketchup - ½ cup
Hot chilli sauce - a little less than ½ cup
Soya sauce - ½ cup

For marinating chicken:
Ginger garlic paste- 1 teaspoon
Pepper - 1 teaspoon
Soya sauce one teaspoon

Method:

1.       Mix chicken in marinade and keep aside.
2.       Heat olive oil in a pan
3.       Add chopped ginger and garlic, sautéing till that finger lickin’ aroma comes about.
4.       Add chicken and stir fry till its whitein colour.
5.       Then toss in onion, carrot, beans and green chillies.
6.       Keep sautéing till it cooks just enough so that the crunchy texture stays.
7.       Finally add capsicum and pepper.
8.       Now add vegetable stock and simmer at high flame so that water content is reduced to minimum.
9.       Mix all contents for sauce in a bowl and add to the chicken and veggies
10.   Last stir in the corn flour
11.   Serve hot.

Saturday, September 25, 2010

ROMANCE WITH LEFTOVERS!!


Leftovers r something hard to tackle if your family frowns at the sight of it on the table next day....Thank God, AJ is a patient man....Here’s what I do to my prawn/chicken/mixed veg curries when I  don’t have enough to re-heat but do have just so much that you feel guilty about throwing it away. Rice is the magic word....you could call this Stir Fried Rice in “shrimps curry- Mr. Leftover”. The side dish in the picture is something I had to instantly cook up to serve with the rice. Recipe for the same is coming in my next post. Please dont use tangy curries unless u ilke sour rice =)

Ingredients: (serves 4)

For a bowl of curry you can take 2 to 2 ½ cups rice
Butter for cooking and garnish- 3 tablespoon
Chopped Garlic and Ginger- 1 teaspoon each
Chilli powder- 1 teaspoon or green chillies- 2 (optional - strictly for spice lovers)
Mixed veg. (I took frozen) - 1 cup
Vegetables stock (Maggie) - 1 cube
Soya sauce - 1 tablespoon
Ground pepper - 1 tablespoon
Egg -1 scrambled
Spring onion - 1 sprig chopped

Method:
1.       Boil rice, drain and keep aside atleast few hours before preparation time. So that it cools down.
2.       Melt butter in a pan.
3.       Add chopped ginger and garlic, sautéing till that great aroma comes about.
4.       Toss in frozen mixed vegetables and stir.
5.       Add leftover curry and vegetable stock. Cook with lid on till the veggies are fully done.
6.       Then mix in scrambled eggs, spring onion and soya sauce.
7.       Finally add the rice and pepper. Mix all ingredients well on a high flame. Add more soya sauce if salt content is less than desired.
8.       Garnish with butter and serve hot.

Tips n Tricks:
·    Don’t overcook the rice. Drain it just before fully cooked. And once cooled to room temperature, you can leave it in the fridge, because fried rice is best made if you have cold rice as grains don’t stick to each other.

Thursday, September 23, 2010

HALLOUMI CHEESE FRITTERS


Cream cheese, feta cheese, cheddar cheese n etc....etc....cheese is one yummy food.....me n AJ are two cheese freaks...n so it’s not surprising when our 1 year old princess loves it more than chocolate....
Halloumi cheese (traditional Cypriot cheese) has a rubbery texture when uncooked but once fried, it’s irresistible. This is my personal off the shelf, tried and tested recipe.

Ingredients: (serves - 3)
Halloumi cheese (traditional Cypriot cheese) - 250 grams diced
Egg - 1
Bread crumbs for coating.
Oil for deep frying

Method:
1.       The salt content in halloumi available in supermarkets is really high. So, its better to dice the cheese and put it in a bowl of water for 30 mins before cooking.
2.       Now while you drain water from the cheese cubes just squeeze them a bit to drain out excess water. Dry the cubes slightly using tissue.
3.       Beat egg , dip each cube in it and coat in bread crumbs. (If you wish to make it spicy add some pepper powder or chilli powder to the bread crumbs before coating.)
4.       Heat oil, on high flame, fry till golden brown.
5.       Serve immediately. The cheese texture hardens if kept for very long after frying.

TUNA & ORZO - INDIAN STYLE


Canned Tuna is one handy item when you need to make a fast and tasty dish. Be it cutlets, samosas, tuna in masala or sandwich. So here's my experiment with canned white tuna, malabari style...the pasta I used is very small...just a little bigger than rice grains....so the spices blend in properly to give you that great taste.

Ingredients: (serves 3 to 4)

Canned Tuna - 2 small or 1 large can
Orzo/ Pasta - 1 medium packet (quantity can be reduced if more spicy taste preferred)
Oil for cooking- 1 tablespoon
Onion- 2 or 3 medium sized finely chopped
Garlic- 1 pod
Ginger- 1 piece (2 to 3 inches)
Tomato- 1 large ripe chopped
Green chillies- 2 or 3
Coriander powder- 2 teaspoons
Cayenne pepper/ Chilli powder- 1 teaspoon
Turmeric powder- 1 teaspoon
Fennel seeds powder- ¼ teaspoon
Garam masala powder- 2 or 3 pinch
Soya sauce - 1 tablespoon
Coriander leaves for garnish- 2 strand finely chopped
Salt to taste

Method:
1.       Cook pasta in salt and water. Drain and keep aside. Check for instructions on cover for correct cooking time and method. Be careful not to over cook the pasta.
2.       Grind ginger and garlic into coarse paste and keep aside
3.       Heat oil in pan.
4.       Sauté onions till transparent. (TIP:  Add salt and keep lid tightly closed for onion to sauté faster.)
5.       Add ginger garlic paste and continue sautéing till the raw smell disappears.
6.       Then add coriander powder, chilli powder, turmeric powder and fennel powder. Mix well. Add small quantity water if too dry to stir. Let it cook for a while till raw smell of masala disappears.
7.       Add tomato and cook till it mixes in properly in masala.
9.       Add soya sauce
8.       Add salt to taste. Please note if tuna is in brine (salt water) then don’t add too much salt.
9.       Cook it till masala is evenly done, adding small quantity of water when ever necessary.
10.   Meanwhile drain water/oil from tuna and mash it with a spoon.
11.   Add tune to mixture and cook for few minutes.
12.   Then add pasta and mix well.
13.   Garnish with coriander leaves and serve hot.

Tips n Tricks:
·         To reduce cooking time u can cook masala powder in a non stick pan at very low heat for a few mins till the raw smell of coriander powder is gone and a nice aroma lingers. But be careful not to burn the powders.
·         For vegetarians substitute tuna with vegetables of ur choice and increase cooking time in step 11.

Tuesday, September 21, 2010

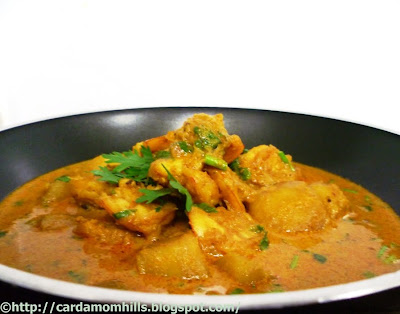
PRAWN N POTATO STEW


Ingredients: (serves 5)


Ingredients: (serves 5)

Prawn - ½ kg
Potatoes - 3 medium peeled and diced
Onion- 2 or 3 medium sized finely chopped
Garlic- 8 cloves
Ginger- 1 piece (2 to 3 inches)
Tomato- 1 large ripe chopped
Green chillies- 2 or 3 slit
Coriander powder- 3 teaspoons
Cayenne pepper/ Chilli powder- 1 teaspoon (increase to 2 for more spicy)
Turmeric powder- 1 teaspoon
Fennel seeds powder- ¼ teaspoon
Garam masala powder- ¼ teaspoon
Coriander leaves - 1 bunch finely chopped
Coconut milk powder-3 heaped tablespoon
Oil for cooking
Water- 4 to 5 cups
Sugar - ½ teaspoon
Salt to taste

For marination:
cayenne pepper/ chilly powder- ½ teaspoon
Turmeric powder - ½ teaspoon
Garam masala- ¼ teaspoon
Salt to taste

Method:
1.       Marinate prawns with listed items and leave in fridge for 15-20 mins.
2.       Grind ginger and garlic into fine paste and keep aside.
3.       Heat 1 tablespoon oil in a vessel.
4.       Sauté onions till transparent.
5.       Add ginger garlic paste and continue sautéing till the raw smell of paste disappears.
6.       Cook powder, chilli powder, turmeric powder in a non stick pan at very low heat for a few mins till the raw smell of coriander powder is gone and a nice aroma lingers.
7.       Then add coriander powder, chilli powder, turmeric powder and fennel powder. Mix well. Add small quantity water if too dry to stir. Let it cook for a while till raw smell of masala disappears.
8.       Add tomato and cook for few more mins.
9.       Add potato pieces, water and salt to taste.  
10.   Cook it on medium to low flame till potato is done and water content reduces to half.
11.   Meanwhile shallow fry the marinated prawn for 3 to four mins in minimum oil.
12.   Add it to the curry when potato is almost done.
13.   In half glass warm water add the coconut milk powder and stir well to get rid of lumps.
14.   Once curry is fully cooked, on a low flame, stir in the coconut milk.
15.   Garnish with coriander leaves and serve with rice pancakes/bread/roti/rice.

EASY WHOLE WHEAT N DAL PAYASAM/ KHEER

Ingredients: (serves 8 to 10)

Toor Dal - 1cup, washed and soaked overnight
Whole wheat- 2 ¼ cups, washed and soaked overnight
Cardamom powder- 1/2 teaspoon
Jaggery- 3 to 4 cubes melted and sieved.

For grinding:
Coconut- 1 and 1/2 grated
Shallots- 1
Cumin seeds- a pinch

Tadka (optional):
Butter- 2 tablespoon
Cashew nuts and Raisins as per ones taste

Method:
1.       Cook dal and wheat in pressure cooker. Water level half an inch below the contents. One whistle on high flame and one on very low flame.
2.       Off the flame and let cooker cool completely before opening.  Picture below shows the texture of dal and wheat u get after cooking.

In here, I have sprinkled cardamom powder on top...
3.       If there is excess water, boil on high flame till reduced to minimum.
4.       Grind listed items with little water. Sieve and separate thick coconut milk. Add to mixture.
5.       Sprinkle cardamom powder and heat on low flame till a frothy texture from the coconut appears on top of payasam.
6.       Add jaggery and mix. Switch off heat.
6.       Heat butter in pan. Roast cachew nuts and raisins.
7.       Pour into payasam. Serve hot or cold as per taste.

Tips n Tricks:
·         Use minimum water and thick coconut milk for the perfect taste.
·         If you like your payasam more mashed and slurred, cook dal and wheat upto 3 whistles on low flame adding adequate water.

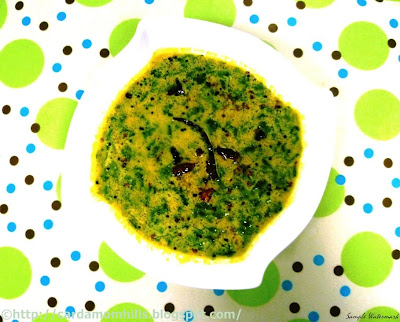
Dal N Spinach in coconut gravy


Ingredients: (serves 3)

Toor Dal - a handful washed and soaked
Green chillies- 2 or 3 slit
Chilli powder/ cayenne pepper- 1/4 teaspoon
Turmeric powder- 1/4 teaspoon
Spinach - 2 bunches cleaned and chopped
Salt to taste

For grinding:
Coconut- ½ grated
Shallots- 3 or 4
Fennel seeds powder-1/2 teaspoon
Ginger- 1 small piece
Pepper corns-3
Curd- 1 tablespoon

Tadka:
Curry leaves- 1 strand
Mustard- ¼ teaspoon
Dry red chillies-2 broken into halves
Fenugreek seeds -4 to 5
Coconut oil- 1 tablespoon

Method:
1.       Cook dal, chilli powder, turmeric powder and green chillies with minimum water and salt.
2.       Once dal is done, add spinach and cook in minimum water with lid on.
3.       Grind listed items into fine paste with little water.
4.       When spinach is completely cooked, reduce flame. Add paste and mix well.  Heat only till a frothy texture from the coconut appears on top of gravy.
5.       Heat oil in pan.
6.       Splutter mustard, add fenugreek seeds and chillies. Sauté and off the flame. Then add curry leaves.
7.       Pour tadka into curry. Serve with rice and pickle.

Tips n Tricks:
·         Those who don’t like to feel too much dal texture in their curry can use masoor dal.

SALMON TIKKA


Ingredients: (serves 4 to 5)
Salmon - ½ kg fillet de-skinned and diced
Butter - 1 spoon (optional for garnish)

For marination:
Hung curd- 1 ½ tablespoon
Cayenne pepper/Kashmiri red chilly powder- 1 teaspoon
Turmeric powder - ½ teaspoon
Garam masala- 1 teaspoon (freshly ground preferred)
Pepper powder- 1 teaspoon
Fresh ginger garlic paste- 1 tablespoon
Lime juice from 1 whole lime
Salt to taste

Method:
1.       Mix marinade into smooth paste.
2.       Spread a large piece of cling film in a bowl. Place salmon pieces in this and coat generously with mixture. Toss in the entire mixture.
3.       Now hold the edged of the cling film and twist into a pouch such that the salmon is intact inside and fully covered.
4.       Place the pouch upside down in the bowl, so that it won’t open up.
5.       Refrigerate for five to six hours.
6.       Carefully uncover and remove pieces one by one without disturbing the coating(now more firm). Place on grill.
(I have used a microwave oven in grill and convection modes.)
7.       Cook in grill mode for 12 mins. Then change to convection (200⁰C) and cook for another 2 to 3 mins.
8.       Switch off and let it stand for 15 mins before transferring to plate.
9.       Garnish with butter and serve as starter.

Tips & Tricks:
·         Cut salmon into 1 inch cubes for the perfect tikka.
Related Posts Plugin for WordPress, Blogger...